Unraveling the Mystery of Your Fridge Compressor
- What You Need to Get Started
- Step 1: Assess the Symptoms—Is Your Fridge Really Failing?
- Step 2: Safety First—Power Down Before You Dive In!
- Step 3: Locate and Inspect the Compressor—The Heart of Your Fridge
- Step 4: Test the Relay—A Quick Check for Common Issues
- Step 5: Check the Start Windings—The Power Behind the Action
- Step 6: Final Diagnosis—Compressor or Not?
- Time to Take Action!
Diagnosing a faulty fridge compressor can save you time and money. This guide will walk you through essential steps to identify and confirm compressor issues, ensuring your fridge operates efficiently. Let’s dive in and get your fridge back to working order!
What You Need to Get Started
Get ready to dive in!

Step 1: Assess the Symptoms—Is Your Fridge Really Failing?
Let’s play detective! Recognizing the signs of a malfunctioning compressor.Observe your fridge closely. Look for signs that could indicate compressor trouble. Are you hearing unusual noises like buzzing, clicking, or humming? These sounds can signal issues within the compressor itself.
Check the cooling performance. If your fridge is not cooling properly, feel the temperature inside. Fridge contents should be around 37°F (3°C) and the freezer should be at 0°F (-18°C). If it’s too warm, your compressor might be to blame.
Watch for frequent cycling. If your fridge is turning on and off repeatedly in short intervals, it may be struggling to maintain temperature, often a sign of compressor or relay issues.
Identifying these symptoms is crucial for your diagnosis—don’t skip this important first step!

Step 2: Safety First—Power Down Before You Dive In!
It’s time to unplug, but don’t panic; safety is your best friend!Unplug your fridge! This is the first and most critical step. You don’t want to risk electric shock while working on your appliance. Imagine reaching in to inspect the compressor, only to accidentally touch a live wire—yikes!
Locate the power cord at the back of the fridge. Give it a gentle pull to disconnect it from the outlet. If your fridge has a dedicated switch, turn that off instead.
Ensure the area is safe: Take a moment to check your surroundings. Clear away any clutter that might interfere with your work. This enables you to move freely and reduces the risk of accidents.
Remember, putting safety first sets the stage for a successful diagnosis. So, make sure your fridge is completely powered down before proceeding!

Step 3: Locate and Inspect the Compressor—The Heart of Your Fridge
Discover the hidden gem in your fridge and why it’s worth the hunt!Find the compressor. Head to the back of your fridge, where most compressors are located. You’ll see a black, cylindrical component, usually sitting on rubber feet. This part is crucial, as it pumps refrigerant and keeps your fridge cool.
Inspect for damage. Examine the compressor closely. Look for dents, rust, or signs of leaks. You might notice oil spots around the compressor—this could indicate a refrigerant leak.
Check for overheating. Carefully place your hand on the compressor. If it feels excessively hot, it may be struggling to function. A hot compressor could be a sign that it’s working overtime or failing.
A thorough visual inspection will help you determine whether the compressor might be the source of your fridge troubles. Dig in and see what you can find!

Step 4: Test the Relay—A Quick Check for Common Issues
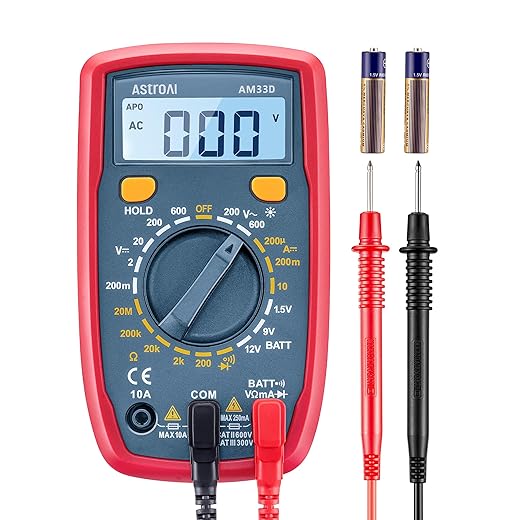
Is this little component causing big problems? Let’s find out!Obtain your multimeter. This trusty tool will help you check the relay’s functionality.
Locate the compressor relay. It’s usually near the compressor itself, often mounted on the side or underneath. Disconnect the wiring that leads to the relay, noting where each wire connects.
Set your multimeter to the ohms setting. Touch one probe to each terminal on the relay. A good relay should show continuity, typically between 5 to 20 ohms. If your reading indicates infinite resistance, the relay is faulty.
Replace it if necessary. A simple relay replacement can breathe new life into your fridge, restoring cooling efficiency without the need for a costly compressor fix. This small part might just save your food and your wallet!
Step 5: Check the Start Windings—The Power Behind the Action
Could the issue be electrical? Let’s dig deeper into the heart of the compressor!Measure the resistance of the start windings. Set your multimeter to the ohms setting and locate the terminals on the compressor. Carefully touch one probe to the start winding terminal and the other to the common terminal.
Interpret your readings. You’re looking for resistance values. A typical reading is between 3 to 12 ohms. If you see an open circuit (infinity), it means the windings are broken. Conversely, if you measure a short circuit (zero ohms), there’s too much power flow, indicating a fault.
Take note of your findings. Understanding these readings helps you make informed decisions about whether to repair or replace the compressor. If the windings are bad, your fridge won’t start, and you’ll need to consider a compressor replacement.

Step 6: Final Diagnosis—Compressor or Not?
Is it time to call a professional or is DIY repair on the table?Analyze your test results. Reflect on what you discovered during your assessments of the relay and start windings. If both components showed signs of failure, it’s likely that your compressor is faulty.
Consider the age of your fridge. If it’s older and you’ve made constant repairs, a replacement compressor may not be worth the investment.
Evaluate your budget and options. Decide if you want to call a professional to replace the compressor or if you prefer to invest in a new fridge altogether.
Gather all findings. You can confidently discuss the issues when speaking to a technician or making a purchase decision. Knowing the state of your compressor empowers you to take informed action, ensuring your food stays fresh and your fridge becomes efficient again.

Time to Take Action!
Now that you’ve diagnosed your fridge compressor, you know if it’s time for repairs or replacement. Trust your findings and make the best choice for your fridge’s future. Will you invest in a fix or embrace a new beginning for your appliance?
This is a lifesaver! I thought my fridge was done for, but turns out it just needed a little TLC. I followed the steps and found a loose wire! 😮 Thanks for sharing this!
Amazing! I love that you found a solution. Fridges can be tricky, but sometimes it’s just a simple fix! 🙌
Great to hear, Chloe! Sometimes a little inspection can save you a lot of money!
Just finished checking my fridge compressor using this guide. I wish I had known sooner about the power down step 😅. It’s a little scary to see all those wires! Anyone else feel the same?
Safety first, Tommy! It’s always better to be cautious! Let us know if you discovered anything interesting.
Totally feel you! I was like, “what have I gotten myself into?” 😂 But the guide makes it easy! Glad it helped!
This was an excellent read! I never thought I could diagnose my fridge myself. 🤭 But I’m still a little confused about the relay testing. Does anyone have tips?
For testing the relay, just make sure to use a multimeter! It sounds tricky, but it’s really not that bad once you get the hang of it!
Great advice, Liam! Megan, if you have specific questions about the relay, feel free to ask!
I’m a bit skeptical about these DIY guides. But I tried it and found my compressor wasn’t the issue, it was actually the thermostat! Kind of a bummer but at least I know!
Thanks for sharing, Oscar! Every bit of troubleshooting helps! Good luck with the thermostat!
That’s a good point! At least you eliminated one problem! Now you can focus on the real culprit.
Wow, this guide is super helpful! 🤩 I’ve been dealing with a weird humming noise from my fridge for weeks now, and I had no idea it could be the compressor. I’m definitely going to try these steps. Has anyone else had success with diagnosing their fridge with this?
Thanks, Sarah! Let us know how it goes after you give it a try!
I had a similar issue! The humming was driving me nuts, turned out to be the compressor relay. Good luck! 🍀
Okay, I’m not very handy, but I gave this a shot and it worked. Kind of. The compressor is still making weird noises, but at least I know it’s not totally dead. 😂 I might just let it run its course…
Ha, I feel you! Sometimes they just want to be dramatic 😆. Have you tried checking the start windings as it suggests?
Every step counts, James! Keep us posted on how it goes!
Nice guide! But why does it always seem like the compressor goes out right after the warranty ends? 😂 Anyway, I’m gonna give these tips a shot this weekend. Wish me luck!
Right? It’s like they have a timer or something! Good luck! I’m sure you’ll nail it! 💪
Good luck, Nathan! Let us know how it turns out!
This article is a bit overwhelming with all the steps. 😅 I’m not sure if I’m ready to tackle my fridge just yet. Has anyone ever called for help instead?
I called a pro once because I was scared I’d break something! They had it sorted in no time, but it was pricey. You could try it yourself first!
No worries, Karen! Sometimes it’s best to take it slow. If you still have questions, we’re here to help!
I had no idea the compressor was so important! I always thought it was just there to make noise. 😂 Thanks for breaking it down for us!
Haha, right? It’s like the unsung hero of our kitchens! Glad you found it helpful!
Glad you enjoyed it, Bella! It’s always nice to learn something new!