Cleaning your refrigerator coils might seem like a small task, but it can make a big difference! By taking the time to clean these essential components, you enhance your fridge’s efficiency, save energy, and extend its lifespan. Let’s dive in!
What You Need for the Job
Vacuum cleaner
Soft brush
Cloth
Your favorite cleaner
No special skills required!
Best Seller
Frost King Foam Coil Cleaner Spray
Best for heavy-duty coil cleaning
Easily clean coils, fan blades, and filters with this effective foam cleaner. Its no-rinse formula leaves behind a pleasant citrus scent while preventing corrosion and maintaining efficiency.
Create a clean area to work by moving your refrigerator away from the wall. This step is crucial for a thorough clean.
Clear the area: Start by removing everything from the top and sides of your fridge. This makes it easier to pull out and reduces any risk of items falling.
Find some space: Depending on the size of your refrigerator, you’ll want to pull it out at least a foot or so. This distance provides enough room to access the coils comfortably.
Secure the area: If your fridge is tucked into a corner or between cabinetry, ensure there’s enough room to maneuver without damaging the surrounding surfaces.
With your space prepped, you’re ready for the next steps!
Must-Have
3-Piece AC Coil Cleaning Brush Set
Ergonomic tools for deep cleaning
This versatile brush set helps you access and clean hard-to-reach areas of your air conditioner and refrigerator. Made from durable materials, it ensures a thorough clean without damaging your coils.
Unplugging the fridge is essential to ensure your safety while working with electrical components and to prevent any accidents.
Locate the power cord: Find the cord at the back of your refrigerator, and follow it to the outlet. This connection is where you’ll disconnect the power.
Pull the plug: Firmly grasp the plug and gently pull it straight out of the outlet—avoid yanking or tugging on the cord itself. For example, if you’re unable to reach, slide the fridge slightly forward for easier access.
Check for lights: After unplugging, observe that the interior lights of your fridge go out. This confirms that it’s successfully disconnected.
Taking this simple precaution ensures you can clean the coils safely without the risk of electrical shock. Now, you’re all set to dive into the cleaning process!
Editor's Choice
Holikme Dryer Vent Cleaning Kit
Essential for preventing lint buildup
Keep your dryer and appliances clean with this flexible lint brush kit. Its long reach allows you to effectively remove lint and dust from hard-to-reach areas, improving appliance efficiency.
Identify the location of your refrigerator coils. These vital components can be found either at the back or underneath your refrigerator. Knowing where to look saves time and effort!
Check the back: If you see a metal cover at the back of your fridge, gently remove it. You’ll typically find the coils stretched across this area. This setup is common in many models.
Look underneath: If your refrigerator extends to the floor with no visible coils at the back, check underneath. You may need to crouch or bend down to spot them. If there’s a grille, simply snap it off to reveal the coils underneath.
Now that you’ve pinpointed their location, you’re ready for a thorough clean!
Best Value
Flexible Dryer Vent & Coil Cleaning Brush
Reduces fire risk and improves efficiency
This long, flexible brush easily clears lint from your dryer vents and coils, preventing potential fire hazards and ensuring your appliances run efficiently.
Grab a soft brush, and it’s time to tackle that dust! Gently sweep the coils to remove any accumulated dirt and debris. You’ll be amazed at how this simple act can significantly improve your fridge’s efficiency.
Choose the right tool: A paintbrush or a coil cleaning brush works wonders. If you don’t have one, a microfiber cloth can also do the trick.
Apply gentle pressure: Carefully brush along the coils, ensuring you reach every nook and cranny. If you find stubborn dust, don’t hesitate to give it a little extra attention.
Watch for excess buildup: If you notice clumps of dust, remove them with your hand or a vacuum attachment, being careful not to damage the coils.
By keeping the coils dust-free, you allow your fridge to run cooler and more efficiently. Let’s keep going!
Best Value
5-Piece Refrigerator Maintenance Kit
Comprehensive tools for refrigerator care
This all-in-one kit provides everything you need to maintain your refrigerator, from unclogging drain holes to removing frost, ensuring optimal performance and freshness.
Now, it’s time to vacuum the area around the coils to ensure optimal airflow and prevent overheating.
Choose the right vacuum: Use a vacuum with a hose attachment for precision. This will help you access tight spots without disturbing the fridge too much.
Start vacuuming: Carefully run the vacuum around the coils and the surrounding floor area. Pay special attention to corners and spaces where dust likes to settle.
Clear accumulated debris: If you find larger clumps of dust or pet hair, use your hands or a crevice tool to dislodge them before vacuuming them up.
Make a habit of this: Regular vacuuming keeps your fridge running smoothly. Try to do this every six months for maximum efficiency.
By ensuring the area is clean, you’re helping your fridge maintain the sleek performance it deserves!
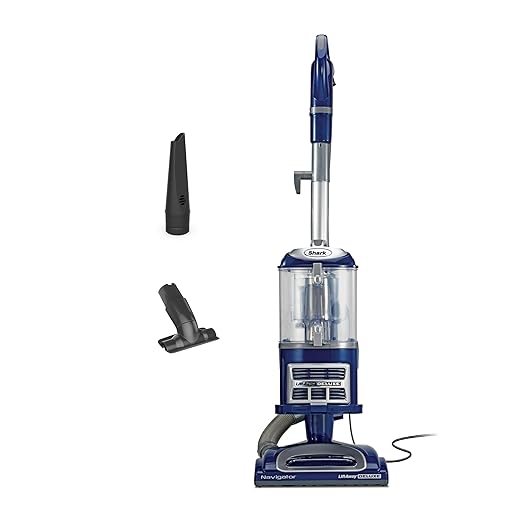
Best Seller
Shark Navigator Lift-Away Vacuum
Best for pet hair and allergens
This lightweight vacuum features a detachable pod for portable cleaning and a HEPA filter to trap allergens, making it perfect for homes with pets and allergies.
Carefully push your refrigerator back into position, ensuring it’s level and stable. Check that it’s not pinching any cords or hoses.
Plug it in: Reconnect the power cord to the outlet, making sure it’s secure. This step is crucial for your fridge to start functioning again.
Reset the temperature settings: If your fridge has a digital display, you may need to reset the desired temperature. Aim for around 37°F (3°C) for the fridge and 0°F (-18°C) for the freezer to maintain optimal food safety.
Enjoy the benefits of your hard work! By cleaning the coils, you’ve taken a fantastic step towards a cooler, more efficient fridge that keeps your food fresh longer.
Must-Have
2 Pack Refrigerator Analog Thermometers
Easy temperature monitoring for fridges
Monitor the temperature of your refrigerator and freezer easily with these analog thermometers. Their large dials ensure clear readability and reliable temperature measurement without batteries.
Congratulations on taking the steps to enhance your refrigerator’s performance! Regular cleaning of the coils can lower energy bills and extend appliance life. Try it out and share your results with friends. Happy cleaning—your fridge will thank you!
Monique Alvarez combines a background in mechanical engineering with a love for practical home solutions. After years designing small appliances, she now dedicates her time to writing detailed reviews, tutorials and buying guides that demystify everything from smart refrigerators to energy-saving appliances. Her goal at ExpertsRecommend.org is simple: help people choose and maintain home products that make life easier and more efficient.
8 Comments
Wow, I never thought my fridge coils could be so dirty! 😳 Thanks for this guide! I didn’t even know they needed cleaning. Just did it today and my fridge is running way quieter now! Can’t believe I waited so long to do this. #LifeHack
Just finished cleaning my fridge coils! Didn’t realize they were covered in dust bunnies. 😅 It’s like a mini workout too! Who knew cleaning could burn calories? 🙃 Thanks for the tips!
Great question, James! It’s perfectly safe to unplug it for cleaning. Just make sure to keep the door closed to maintain the temperature inside until you’re done.


Wow, I never thought my fridge coils could be so dirty! 😳 Thanks for this guide! I didn’t even know they needed cleaning. Just did it today and my fridge is running way quieter now! Can’t believe I waited so long to do this. #LifeHack
Right? I was shocked too! It’s like a whole new fridge in my kitchen now. 😂
So glad to hear it worked for you, Sarah! Keeping those coils clean really makes a difference!
Just finished cleaning my fridge coils! Didn’t realize they were covered in dust bunnies. 😅 It’s like a mini workout too! Who knew cleaning could burn calories? 🙃 Thanks for the tips!
Haha, right!? I felt like I deserved a medal after cleaning mine. 😂
This seems easy enough! Just a little hesitant about unplugging the fridge though. Is it safe to leave it unplugged for a while?
Great question, James! It’s perfectly safe to unplug it for cleaning. Just make sure to keep the door closed to maintain the temperature inside until you’re done.
I usually only unplug mine for a few minutes, but I guess it’s fine as long as you’re quick about it!