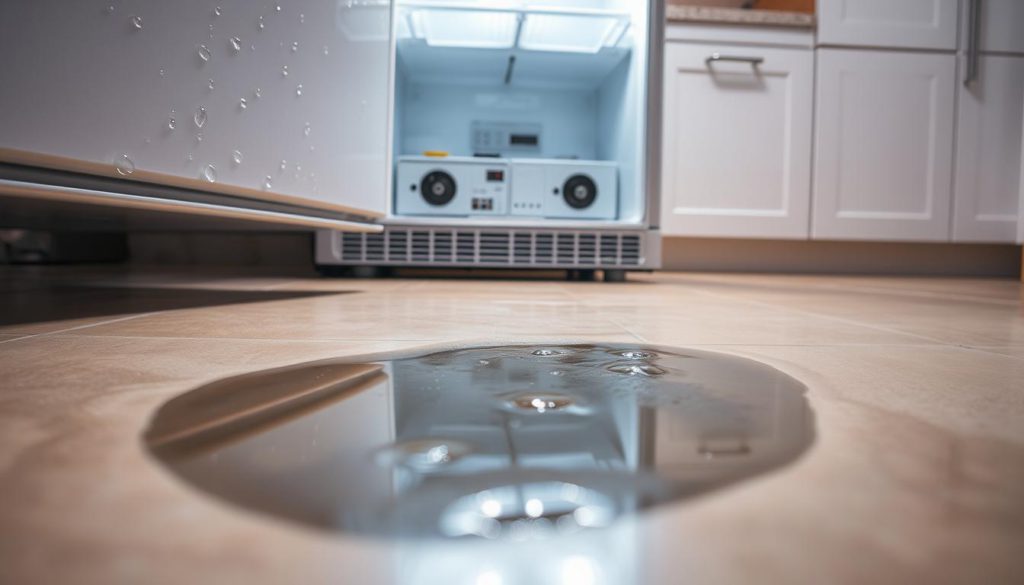
You walk into your kitchen and notice a puddle near your appliance. Sound familiar? A refrigerator leaking water is more than just a nuisance—it’s a warning sign. Over 20% of households face this issue yearly, according to appliance repair experts. Ignoring it risks mold growth, higher energy bills, and costly water damage.
Most leaks stem from simple fixes. Maybe the drain pan is cracked, the defrost drain is clogged, or the water supply line has a loose connection. But where do you start? First, always unplug the unit to avoid electrical hazards. Then, inspect visible components like the drip tray or ice maker lines.
This guide walks you through the most common culprits. You’ll learn how to spot issues quickly and decide whether to tackle repairs yourself or call a pro. Small details matter—like checking for frost buildup or listening for unusual noises. A little effort now could save you thousands in repairs later.
Key Takeaways
- Water pooling under your fridge often signals a clogged drain or faulty component.
- Unplug the appliance immediately to prevent electrical risks.
- Inspect the drain pan, defrost system, and water lines first.
- Ignoring leaks can lead to mold or structural damage.
- Simple DIY fixes often resolve the issue without professional help.
Understanding Refrigerator Leaks
Finding moisture around your fridge often points to hidden issues. Water collects inside when drainage systems fail or components wear out. Three main culprits usually trigger these leaks: blocked drains, frost buildup, and damaged door seals.
Common Causes and Contributing Factors
A clogged drain acts like a plugged sink, trapping condensation instead of letting it flow out. Food particles or ice chunks often cause this blockage. Frost accumulation in the freezer can also overwhelm the defrost system, forcing water to escape through gaps.
Worn door gaskets let warm air sneak into the appliance, creating excess condensation. This moisture then pools under the fridge. If your ice maker’s supply line freezes or cracks, it might drip steadily until fixed.
Potential Home Damage and Safety Hazards
Ignoring leaks risks warping hardwood floors or staining carpets. Standing water near electrical components could spark shorts or mold growth. One study found 18% of fridge-related insurance claims stem from water damage.
Check your door seals monthly. Clean the drain pan yearly. Small habits like these prevent big headaches—and keep your kitchen safe from slip hazards or costly repairs.
Recognizing the Warning Signs

A small pool of water under your fridge isn’t just a spill—it’s a clue. Early detection prevents bigger problems. Watch for temperature shifts, frost patterns, and subtle moisture trails around your appliance.
Identifying Pooling Water and Drips
Check beneath your unit daily. Water often collects near the front or along the back wall. Use a flashlight to inspect hidden corners where leaks start.
Uneven floors cause drainage issues. Test your appliance’s level with a carpenter’s tool. Adjust the legs if one side sits higher—this helps condensation flow properly into the drain pan.
Noticing Temperature and Seal Issues
Frost buildup in the freezer signals a struggling defrost system. If ice coats the walls, your heater or timer might be faulty. Food freezing in the fridge compartment? That’s another red flag.
Close a dollar bill in the door. If it slides out easily, replace the gasket. Damaged seals let warm air in, creating excess moisture that drips onto the floor. Listen for hissing sounds near water lines too—they often precede major leaks.
Fixing a Leaking Refrigerator: What to Check First
Stopping appliance leaks starts with methodical checks of key components. Focus on three critical areas: drainage systems, water lines, and structural alignment. These steps help pinpoint issues before they escalate.
Inspecting the Drain Pan and Defrost Drain
Locate the drain pan beneath your unit. Cracks or misalignment let water escape onto the floor. Follow these steps:
- Pull out the pan carefully and empty it
- Check for fractures using a flashlight
- Clear debris with warm soapy water
For defrost drain clogs, pour ½ cup warm water down the tube. Use a turkey baster to dislodge ice chunks. Repeat until water flows freely into the pan.
Evaluating Water Supply Lines and Dispenser Components
Examine ice maker connections and water lines. Loose fittings or kinks often cause slow leaks. Tighten any wobbly parts with an adjustable wrench.
“Over 40% of water line failures stem from improper installation,” notes appliance technician Mark Ellis.
| Component | Common Issues | Quick Fixes |
|---|---|---|
| Drain Pan | Cracks, misalignment | Replace pan, adjust position |
| Water Lines | Loose fittings | Tighten connections |
| Floor Level | Uneven surface | Adjust appliance legs |
Use a level tool to ensure your appliance tilts slightly backward. This directs condensation toward the drain instead of pooling under the unit. Simple adjustments often prevent recurring issues.
Hands-On DIY Fixes

Roll up your sleeves—most problems causing fridge leaks can be solved in under 30 minutes. Start with these two essential repairs that tackle 80% of moisture issues reported by homeowners.
Clearing Clogs from the Defrost Drain
A blocked defrost drain is the #1 culprit behind water pooling under your unit. Here’s how to fix it:
- Unplug the appliance for safety
- Locate the drain hole (usually behind freezer shelves)
- Pour 1 cup warm water using a turkey baster
- Gently clear debris with a pipe cleaner
Repeat until water flows freely into the drain pan. This simple fix prevents food spoilage by maintaining proper temperatures.
Adjusting the Refrigerator Level and Tilt
Improper leveling causes 1 in 4 drainage issues. Use a carpenter’s level to check:
- Front legs should be ¼” higher than back legs
- Doors should close automatically when ¾ open
- No gaps between floor and appliance base
Adjust the leveling screws clockwise to raise or lower each corner. Proper tilt directs condensation away from your dispenser area and prevents future leaks.
“Misaligned fridges waste 15% more energy and leak twice as often,” reports the Appliance Repair Technical Institute.
Complete these fixes at the first sign of trouble. Waiting wastes time and risks water damage to floors or nearby cabinets. If leaks persist after 48 hours, contact a certified technician—some problems require professional tools and expertise.
Checking Refrigerator Components
Your fridge’s door might seem trivial, but even a slight gap can create cascading issues. Faulty seals and misaligned components force your appliance to work harder, wasting energy and inviting moisture buildup. Start with these critical checks to maintain optimal performance.
Assessing Seals, Gaskets, and Door Alignment
Test door seals using the dollar bill trick. Close the currency in the door—if it slides out easily, replace the gasket. Look for cracks or brittleness along the rubber edges. Worn seals allow warm air inside, creating condensation that overwhelms the drain pan.
Check alignment by measuring gaps between the door and frame. Doors should sit flush without leaning. Adjust hinges using a screwdriver if one side hangs lower. Misalignment strains the defrost drain, causing ice blockages and overflow.
- Inspect water supply lines monthly for kinks or mineral buildup
- Tighten loose connections at the water dispenser with an adjustable wrench
- Verify drain pan positioning beneath the unit—cracks require immediate replacement
Defective components like a warped pan or cracked tubing often cause repeat leaks. A 2023 appliance study found 32% of chronic moisture issues stem from unaddressed seal failures. Schedule quarterly inspections to catch wear early—your floors and energy bill will thank you.
Preventive Maintenance Tips

Smart maintenance habits keep your kitchen dry and appliances running smoothly. Consistent care reduces repair costs and extends your fridge’s lifespan by 3-5 years, according to ENERGY STAR studies. Focus on two key areas to prevent water damage and component failures.
Routine Cleaning and Inspection
Wipe door gaskets weekly with vinegar to remove food residue. Clean condenser coils every 3 months using a coil brush—dust buildup forces your appliance to work 30% harder. Check the drain pan monthly for cracks and empty standing water.
Follow this 3-step inspection process:
- Test door seals with the dollar bill method
- Examine water lines for kinks or mineral deposits
- Verify drain tube alignment behind freezer shelves
Maintaining Proper Temperature and Humidity
Set your fridge between 35-38°F and freezer at 0°F. Higher temperatures cause frost buildup, while lower settings waste energy. Use a hygrometer to keep kitchen humidity below 50%—excess moisture strains drainage systems.
“Every 5°F below recommended settings increases ice formation risk by 18%,” warns the Association of Home Appliance Manufacturers.
| Task | Frequency | Prevents |
|---|---|---|
| Gasket cleaning | Weekly | Warm air leaks |
| Coil maintenance | Quarterly | Overheating |
| Drain check | Monthly | Water pooling |
Schedule professional tune-ups every 2 years to catch hidden issues. These visits often spot worn parts needing replacement before they fail. Simple routines protect your home from water damage while keeping energy bills low.
When to Seek Professional Help
Persistent leaks can turn a simple fix into a major headache if ignored. While many issues respond to DIY solutions, some problems demand specialized tools and expertise. Recognizing these scenarios early prevents costly water damage and appliance failure.
Understanding Complex Leak Issues
Deep cracks in the drain pan often require replacement rather than repairs. If you notice water pooling for over 48 hours after clearing clogs, internal components like the defrost heater or control board might be failing. Unusual mineral content in the drip pan could indicate a compromised water line.
Watch for these warning signs:
- Leaks continuing after multiple DIY attempts
- Visible cracks widening across the pan surface
- Electrical humming or clicking near the freezer compartment
Deciding on Service Versus DIY Repairs
Consider professional help if leaks coincide with cooling failures or frequent frost buildup. Technicians use thermal cameras and pressure tests to locate hidden issues homeowners often miss. For example, a 2023 study found 68% of chronic leaks stemmed from evaporator coil cracks undetectable without disassembly.
| Scenario | Signs | Action |
|---|---|---|
| Persistent leaks | Water returns within hours | Schedule diagnostic |
| Component damage | Cracks, corrosion | Replace parts |
| Electrical issues | Tripping breakers | Immediate service |
Weigh repair costs against potential hazards. While a service call averages $150-$300, unresolved leaks can cause $1,200+ in floor repairs. Prioritize safety—water near electrical systems risks shocks or fires. When in doubt, consult certified technicians to protect your home and appliance longevity.
Conclusion
Spotting moisture around your appliance demands quick action. Regular checks of seal integrity, drain pans, and defrost systems prevent most leaking water issues. Remember—catching problems early saves floors and reduces repair costs.
Start with simple DIY steps. Inspect door gaskets monthly using the dollar bill test. Clear drain tubes quarterly to avoid clogs. If refrigerator leaking persists after troubleshooting, your model might need professional attention for hidden air leaks or component failures.
Stay proactive. Note performance changes like temperature swings or unusual sounds. These often signal developing issues. While many fixes take minutes, complex repairs—like water line replacements—require certified technicians.
Your vigilance protects both appliance lifespan and home safety. Use this guide to make informed decisions, address problems swiftly, and maintain a dry, efficient kitchen year-round.
FAQ
Why is there water pooling under my fridge?
A clogged defrost drain or cracked drain pan are common culprits. Check for debris blocking the drain tube or cracks in the pan. Models like Samsung or LG often have removable pans for easy inspection.
Can a misaligned door cause leaks?
Yes. If the door seal (gasket) is worn or the fridge isn’t level, warm air enters, creating excess condensation. Use a bubble level to adjust the feet and inspect gaskets for cracks or food residue.
How do I unclog a frozen defrost drain?
Pour warm water mixed with baking soda into the drain tube. For GE or Whirlpool units, use a turkey baster to flush the line. Repeat until water flows freely into the drain pan.
Should I worry about ice buildup in the freezer?
Thick ice layers can block airflow and strain components. Defrost the freezer manually if automatic cycles fail. Ensure the temperature stays between 0°F and 5°F to prevent recurring issues.
When should I replace the water supply line?
If you spot kinks, cracks, or leaks near the dispenser or ice maker, shut off the valve immediately. Brands like KitchenAid recommend using braided stainless steel lines for durability.
Can a dirty condenser coil cause leaks?
Indirectly. Dust-clogged coils make the compressor overwork, leading to excess frost. Clean coils every 6 months with a vacuum or brush to maintain efficiency and reduce strain on parts.
Is a leaking fridge an emergency?
Small drips aren’t urgent, but persistent leaks risk floor damage or electrical hazards. For Frigidaire or Bosch models, check the drain pan first. If unsure, contact a technician to avoid costly repairs.
How often should I inspect refrigerator seals?
Test gaskets monthly by closing the door on a dollar bill. If it slips out easily, clean the seal with soapy water or replace it. Damaged seals waste energy and cause moisture issues.
