Illuminate Your Kitchen: A Simple Guide to Replacing Your Refrigerator Light Bulb
- What You’ll Need: Gather Your Tools and Supplies
- Step 1: Unplug Your Refrigerator – Safety First!
- Step 2: Locate the Bulb – Where’s That Light Hiding?
- Step 3: Remove the Old Bulb – Out with the Old!
- Step 4: Choose the Right Replacement Bulb – Not All Bulbs Are Created Equal!
- Step 5: Install the New Bulb – Brighten Up Your Fridge!
- Step 6: Power Up and Enjoy – Time to Celebrate Your Success!
- Brighten Up and Keep Cool!
Replacing a refrigerator light bulb is a quick and easy task that can dramatically improve visibility and efficiency in your kitchen. This guide walks you through each step, ensuring you can complete the process safely and effectively, bringing new light to your fridge and your cooking adventures!
What You’ll Need: Gather Your Tools and Supplies

Step 1: Unplug Your Refrigerator – Safety First!
Why You Should Always Disconnect Before You ConnectStart by unplugging your refrigerator. This crucial step prevents electrical shocks, ensuring your safety while you work. Locate the power cord, usually at the back or side of your appliance, and pull it from the outlet. If you’re in a tight spot, consider moving the fridge forward slightly to reach the plug easily.
Don’t skip this! Even if you think the light bulb replacement seems harmless, working with electrical appliances always carries risk. Imagine the hassle of dealing with a shock or malfunction. By securing your refrigerator’s power source, you set the stage for a smooth and safe bulb replacement experience. Now that you’re plugged out, you’re ready to proceed to the next step!

Step 2: Locate the Bulb – Where’s That Light Hiding?
Discovering the Secret Spot for Your Refrigerator Light BulbFind the light bulb compartment in your refrigerator. Typically, this compartment is located on the ceiling or one of the side walls, depending on your fridge model. Knowing its exact position makes the replacement process more efficient and straightforward.
Use a flashlight if it’s dark inside! This simple tool can illuminate any hidden corners, helping you spot the bulb effortlessly.
To help you visualize, if you open the refrigerator door and see a protective cover, glance towards the back or top; that’s often where the bulb sits.
Don’t waste time fumbling around! Identifying the bulb compartment early on enables you to move swiftly to the next steps of your light bulb replacement journey.

Step 3: Remove the Old Bulb – Out with the Old!
Say Goodbye to the Dull Glow and Unscrew Away!Gently twist or pull out the old bulb from its socket. Depending on your refrigerator model, some bulbs are designed to twist out while others simply pull straight down. If it’s a twist bulb, turn it counter-clockwise until it loosens. If it seems stuck, don’t hesitate to apply a little extra force—just be cautious not to break it!
Avoid using sharp tools! Instead, rely on a firm grip to ensure you handle the bulb safely. Imagine you’re playing a game of tug-of-war—with the right technique, you’ll win without causing a mess.
Be mindful of shattered glass! If your bulb breaks, carefully clean up any pieces to prevent injury. Now that the old bulb is out, you’re one step closer to a brighter fridge!

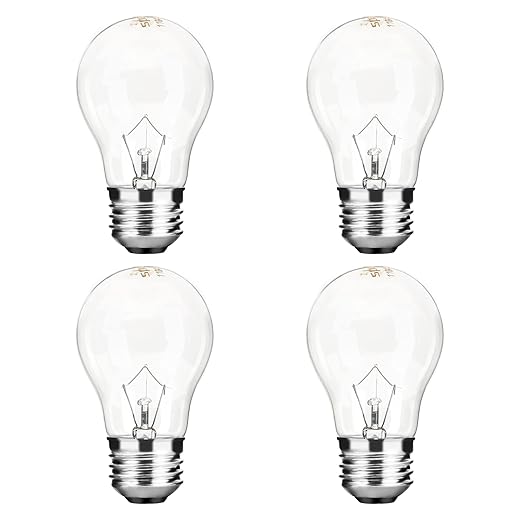
Step 4: Choose the Right Replacement Bulb – Not All Bulbs Are Created Equal!
The Secret to Picking the Perfect Bulb for Your FridgeCheck the wattage and type of the old bulb to ensure you choose the right replacement. Look for a label on the old bulb, or consult your refrigerator’s manual for this information. Common refrigerator bulbs typically range from 40 to 60 watts, but your model may vary.
Consider upgrading to an energy-efficient LED bulb. Not only do they last longer, but they also consume less energy—saving you money on your electricity bill over time. For instance, if your old bulb was incandescent, switching to LED can reduce your usage significantly.
Bring the old bulb to the store as a reference. This way, you can compare sizes and bases to find the perfect match. With the right bulb in hand, you’re ready to brighten up your fridge soon!
Step 5: Install the New Bulb – Brighten Up Your Fridge!
Transform Your Appliance with a Simple Twist!Insert the new bulb into the socket. If you have a twist bulb, gently align it with the socket and rotate clockwise until it feels secure. For push-in bulbs, firmly press it into the socket until it clicks.
Double-check the fit! Make sure the bulb is snug but avoid over-tightening, as this can damage the fixture. Think of it like closing a jar; you want it sealed without excessive force.
Watch for your refrigerator’s light to shine once again! As soon as the bulb is in place, you should see a warm glow illuminating your fridge. If the light doesn’t come on, double-check the installation and ensure you’ve chosen the right type of bulb. Here’s to a bright, well-lit fridge!
Step 6: Power Up and Enjoy – Time to Celebrate Your Success!
Flip the Switch and Bask in the Glow of Your Hard Work!Plug your refrigerator back in. Take a moment to ensure that the power cord is securely connected to the outlet. Once plugged in, listen for the hum of the refrigerator coming back to life—it’s like music to your ears!
Check that the new bulb lights up. Open the refrigerator door and bask in the glow of your newly replaced bulb. If it shines brightly, you’ve successfully completed the task! Admire the clear, illuminated shelves, making it easier to spot your favorite snacks.
Feel accomplished! You tackled this task yourself, proving that home maintenance doesn’t have to be daunting. Celebrate your success and enjoy the fresh brightness in your kitchen every time you reach for a snack.
Brighten Up and Keep Cool!
Congratulations! You’ve successfully learned how to replace your refrigerator light bulb. Now that you know the steps, give it a try and light up your fridge. Don’t forget to share your results with friends and let them know how easy it can be to keep their kitchens bright!
I feel like a total nerd for getting excited about changing a light bulb, but this guide made it fun! I actually did a little dance after I installed the new one. 😂 Thanks for making it so easy!
Yay! Dance party in the kitchen! 😂 I did the same thing when I fixed mine.
You should share a video of that dance! 😂
Haha! Love that enthusiasm, John! Dancing is always a great way to celebrate a mini victory!
Thanks for this! I replaced mine last week, and it was a breeze! I didn’t even need a second pair of hands, which is always a miracle in my household. 😅 I just wish my kids would stop leaving the fridge door open!
Glad it went smoothly for you, Lisa! And yes, kids can be notorious for that. Maybe a reminder note on the fridge could help? 😄
Or maybe a fridge timer? That would be genius! 😂
Haha! I feel you! My kids act like they’re in a grocery store. 😂
This was cool, but I wish you had included what type of bulb I should be getting. I went to the store and came back with a box of LEDs, which I’m not sure will work. Anyone else have this issue?
I had the same problem! I ended up buying the wrong size. Just check the old bulb before heading to the store!
Exactly! It’s always good to take the old bulb with you or check the specs first.
Great feedback, Tom! We’ll consider adding more details about bulb types in the future. For now, make sure it’s the same wattage as the old one.
This guide is super helpful, but can someone tell me if it’s safe to use any bulb? I saw a bright one that looks good, but I don’t want to cause a fire or anything. 😬
Absolutely, Rachel! Make sure it’s a refrigerator-specific bulb. They’re designed to handle the cold and won’t overheat.
Good call! Yeah, you don’t want to blow your fridge up with the wrong bulb. Stick to those rated for appliances.
I just stick to the brand my fridge came with. Can’t go wrong with that!
Wow, I never knew it was this easy to change a light bulb in the fridge! I always thought it was some complicated thing. Thanks for breaking it down step by step. Can’t wait to try this out and finally stop relying on my phone flashlight to find stuff in my fridge! 😂
Right? I was always afraid I’d break something. But now I feel like a fridge technician! 😂
So true! I was just using a candle to see inside my fridge… not ideal. 😂
Glad you found it helpful, Sarah! It’s surprising how simple it can be once you know the steps. Let us know how it goes!